User onboarding
Complete workflow to register a user in the identity registry and issue KYC verification.
This guide walks Identity Managers through the complete user onboarding workflow. It covers the steps after a user has created their account and wallet through the User Onboarding process. To complete all steps in this runbook, you will need both the Identity Manager and Verification Issuer roles.
Prerequisites
- Identity Manager role for registry registration
- Verification Issuer role for issuing KYC verifications
- Must be configured as trusted issuer for KYC topic
- User must have completed onboarding with on-chain identity
About the onboarding workflow
As an Identity Manager, you complete two key steps to fully onboard a user:
- Register in identity registry - Add the user to the on-chain registry with their jurisdiction
- Issue KYC verification - Attest that you have verified the user's identity
User states
| State | Description | Can receive assets |
|---|---|---|
| Pending Registration | User completed onboarding but not in registry | No |
| Registered | Added to registry, awaiting verification | Depends on asset rules |
| Verified | Has required KYC verification | Yes |
Onboarding steps
Verify user readiness
Before starting, confirm the user has completed their onboarding:
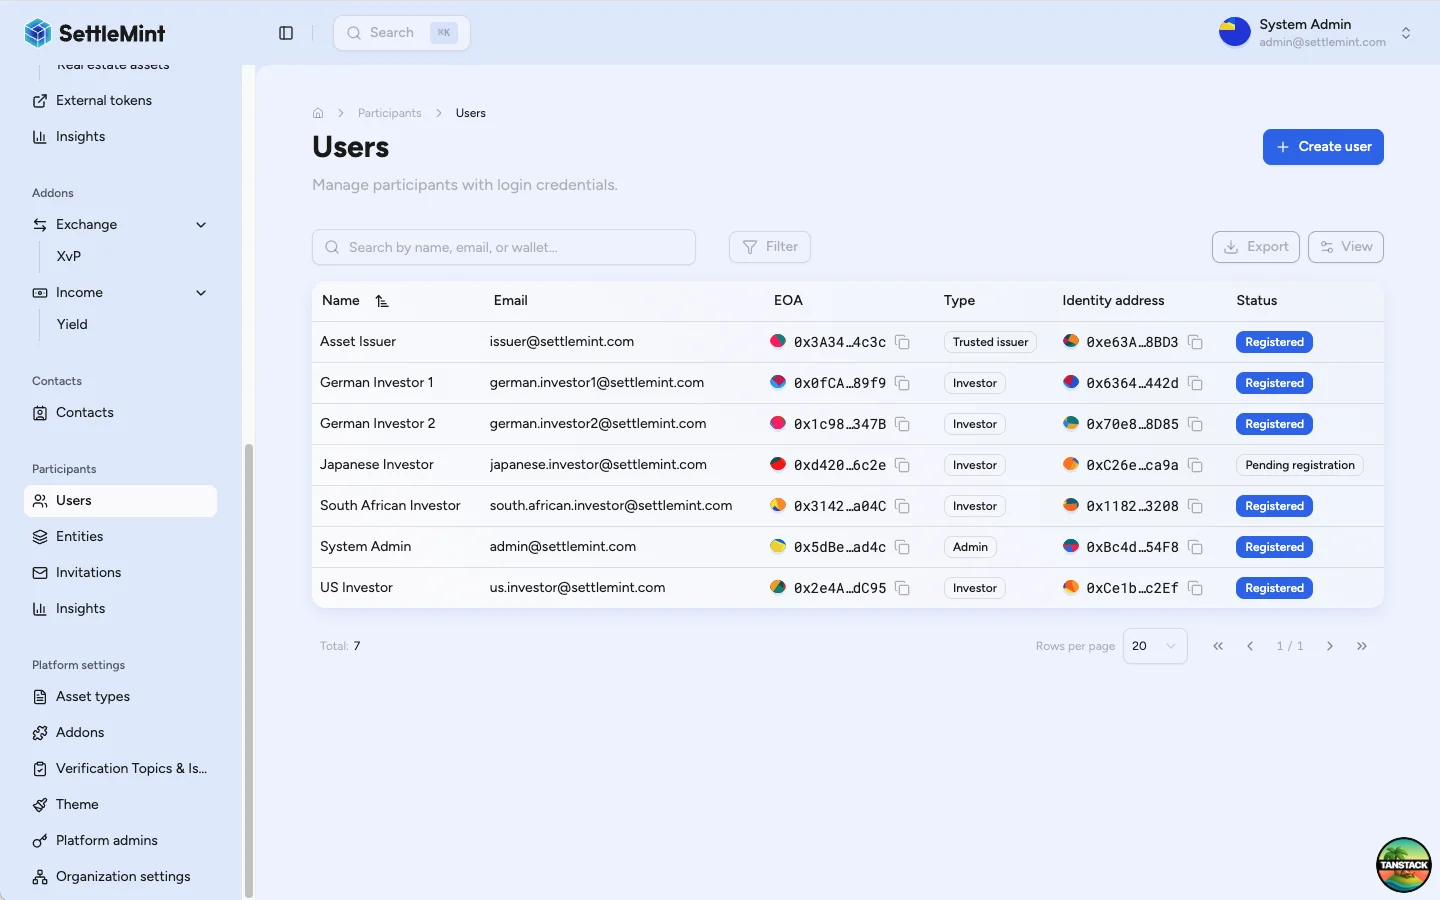
- Navigate to Participants > Users
- Find the user and check their status
- Verify they have an Identity address assigned
If the user shows no identity address, they haven't completed onboarding yet. See User Onboarding for what the user needs to complete.
Register in identity registry
Registration adds the user to the on-chain identity registry with their jurisdiction.
Follow Register User to:
- Select the user from the Users list
- Click Register Identity
- Choose the appropriate jurisdiction based on user documentation
- Complete the registration transaction
Jurisdiction selection
Choose based on the user's legal residence or incorporation. This determines applicable compliance rules.
After transaction confirmation, verify the user status changed to "Registered".
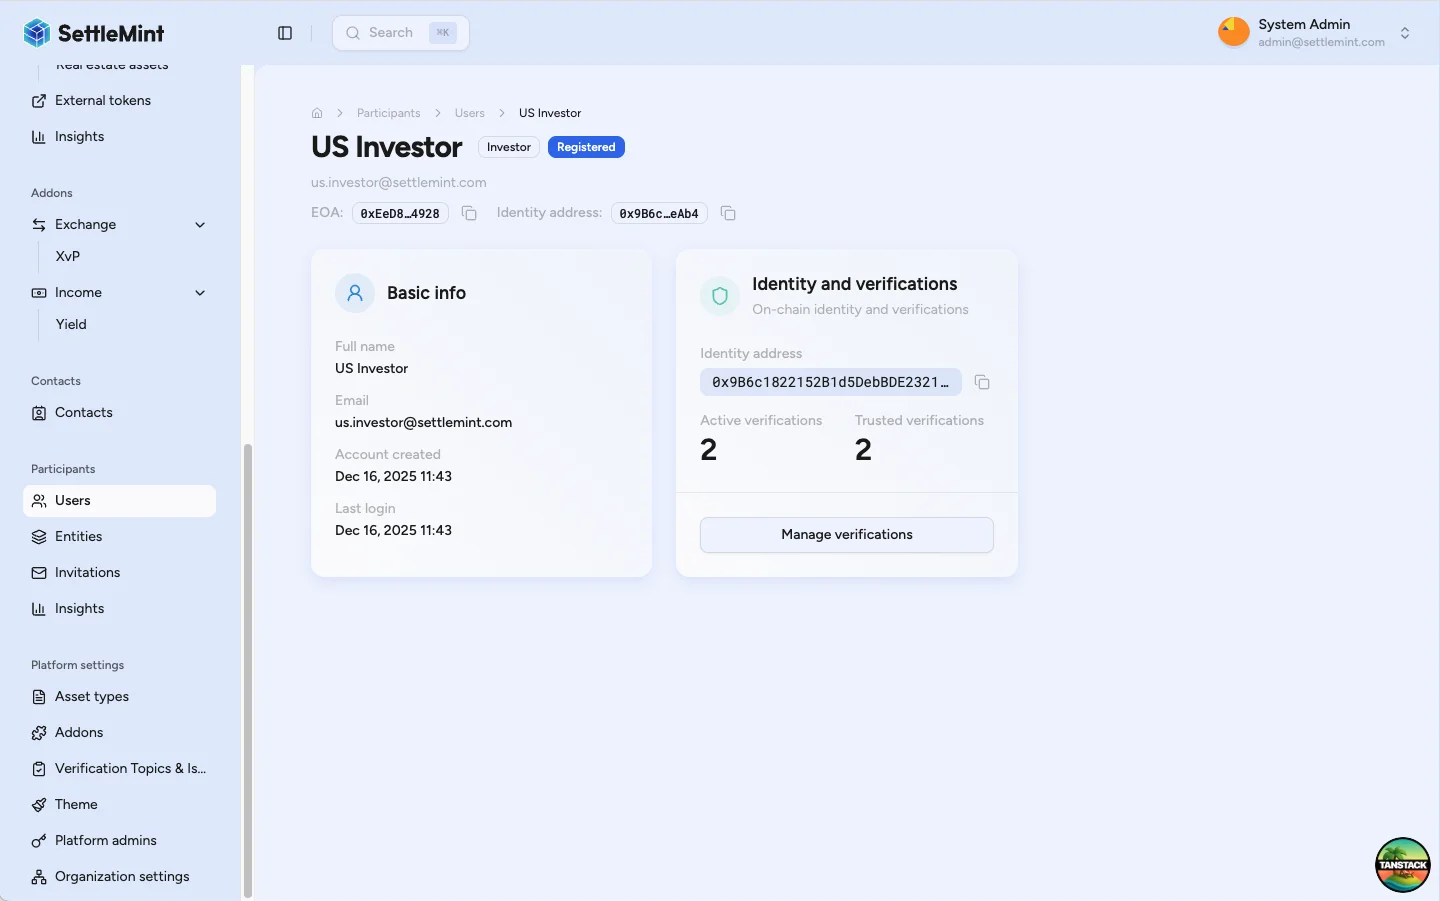
Issue KYC verification
With the user registered, issue a KYC verification to attest their identity.
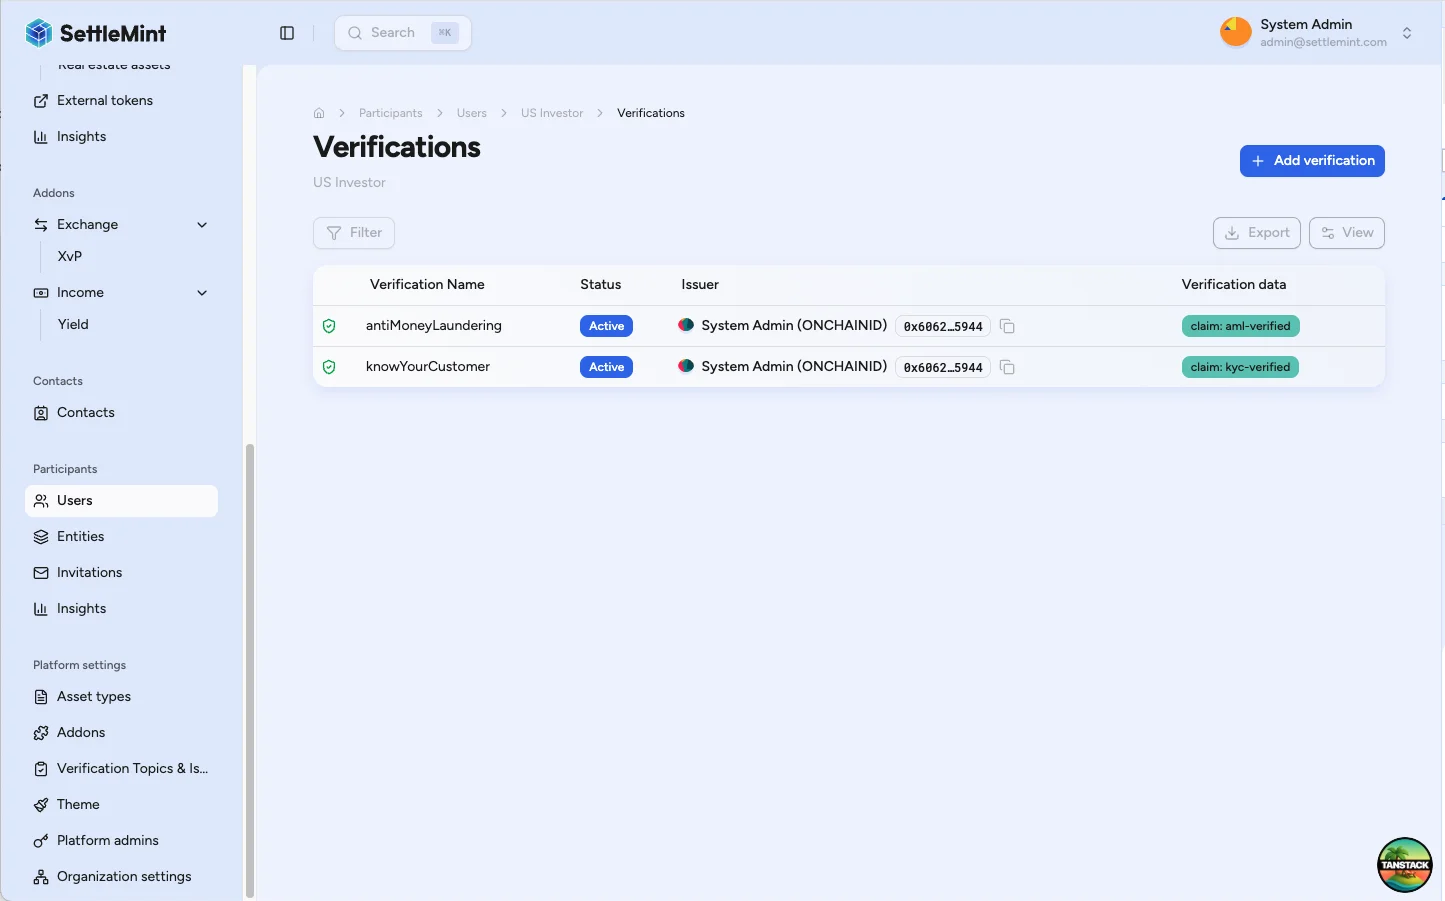
Follow Verify KYC to:
- Access the user's profile and click Manage verifications
- Click Issue verification
- Select Know Your Customer (KYC) topic
- Complete the verification transaction
Trusted issuer status
A green shield next to the verification confirms you are a trusted issuer for KYC. Without trusted issuer status, your verification won't satisfy compliance requirements.
Verify completion
After issuing the KYC verification:
- User appears with verified status
- User can now receive assets that require KYC verification
- Additional verifications may be needed depending on asset-specific compliance rules

Troubleshooting
| Issue | Solution |
|---|---|
| Cannot see Register Identity button | Verify you have Identity Manager role and user has on-chain identity |
| Registration transaction fails | Check wallet has sufficient gas and correct user is selected |
| Cannot see Issue verification button | Verify you have Verification Issuer role and are configured as trusted issuer |
| Verification not showing green shield | Confirm you're a trusted issuer for KYC topic |
| User still cannot receive assets | Check asset-specific compliance requirements beyond KYC |
Related guides
- User Onboarding - Understanding the user's onboarding flow
- Provide KYC Data - How users complete their KYC profile
- Manage KYC Data - Review and approve KYC submissions
- Register User - Detailed registration reference
- Verify KYC - Detailed verification reference
- Configure Trusted Issuers - Set up verification permissions
- Compliance Overview - Understanding verification framework